Chad performing a vault to a Parkour shoulder roll.

8 Categories of Parkour Movement

I’m about to say something controversial in the Parkour community – Parkour is a system of technical movements.  Now, before you go freaking out over this concept, I also believe Parkour can be a mindset of continuous improvement and creative problem solving to overcome mental obstacles and all that blah blah blah woo woo shit.  However, it’s nearly impossible to coach a discipline based on intangible concepts like that.  To have the absolute best Parkour classes in the Twin Cities, I knew I had to create a system that would work for anyone and everyone who comes in.  So I want to share with you my creation of the system of technical movements that make up Parkour that we teach at Fight or Flight Academy and FoFa Online.

Chad performing a vault to a Parkour shoulder roll.

When I first started coaching Parkour 15 years ago, I knew I had to create a functional system for teaching.  I was already a second degree black belt and had been teaching martial arts for years.  Using the concepts of teaching martial arts (class style, drill setup, progressions, measurement systems, etc.) I started to create a standard teaching system for Parkour to have the best Parkour classes in the Twin Cities!  Nothing like this had really been done before as most Parkour instructors didn’t have any previous coaching experience and just sort of made it up as they went.  This was back around 2008 when most Parkour “coaches” had only been training themselves for a few years and had never taught anything else.

This system has been changed, tweaked, updated, and upgraded countless times over the years, but I believe the current setup works extremely well and covers things thoroughly.  We split up everything into 8 categories and further break those down into smaller categories as one progresses through our levels.  So let’s take a look at how we break things up one by one.

Our first category of movement – 
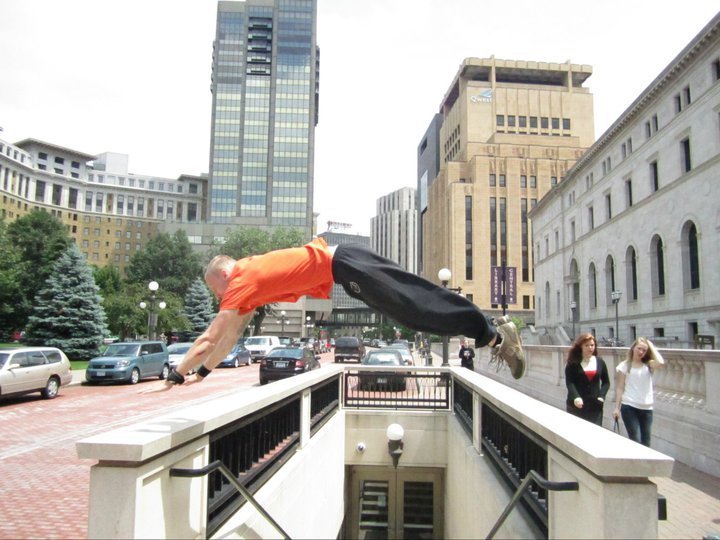
LANDINGS
Chad Zwadlo: teacher of the best Parkour classes in the Twin Cities

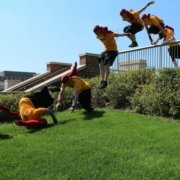
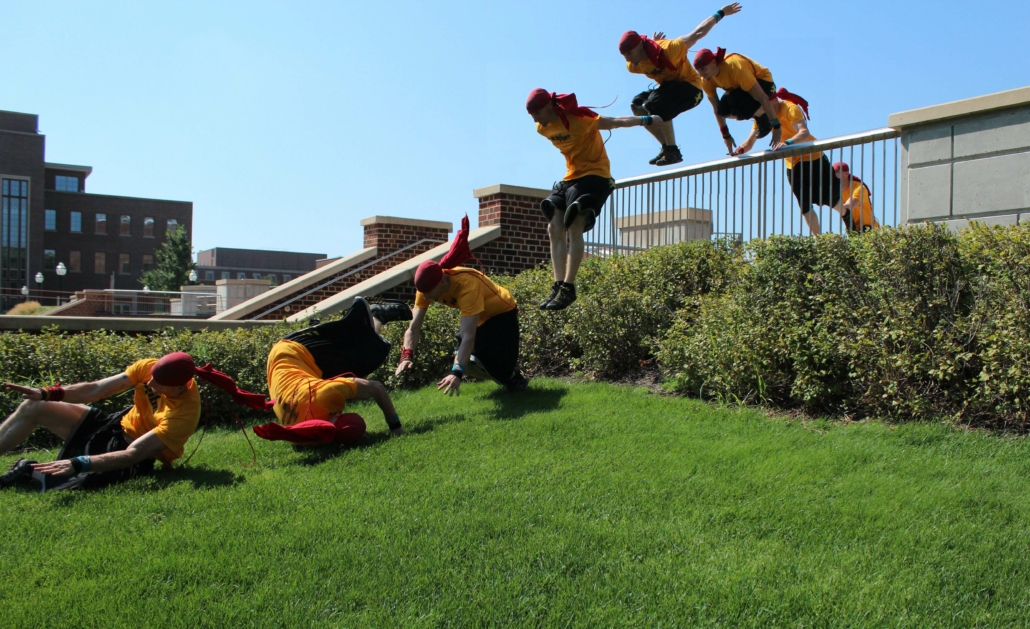
We start with landings because I believe that a good landing is the single most important technique in Parkour training.  Nearly everything we do has some sort of impact involved and learning to absorb, redirect, or resist against that impact will save your body in the long run.  Parkour is meant to be practiced for a lifetime, having good landings will allow that.  

Our beginner program actually starts with learning to fall properly.  As a Parkour practitioner, you WILL fall down at some point.  Learning how to fall properly and safely is a good way to start your training.  This also shows our students that it’s ok to fall!  One of our big lessons starting with day one is that failure is ok and even necessary to the learning process.  So the first thing we teach is a proper back, side, and front breakfall.

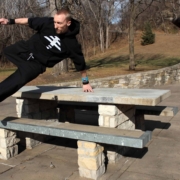
Next in our beginner landing curriculum is balance.  We cover techniques of balancing while walking along an obstacle as well as standing perpendicular to the obstacle, which leads directly into the precision jump.  All of this is taught at ground level to start with.  Perfect the technique before increasing the height.

Then we get into the basic landing that we call a “slap out”.  This technique has tons of names all over the world: “depth drop,” “frog squat,” or just “parkour landing” to name a few that I’ve heard.  Essentially it’s the idea of absorbing all of your downward impact and coming to a complete stop as quietly and safely as possible.  We rarely want to come to a complete stop in Parkour though, so we immediately teach a couple basic momentum transferring techniques as they tend to be more useful while actually moving around.  

Finally in our beginner landing curriculum we cover the top 3 of the “Landing Continuum” which I took from a really old Ryan Ford video.  His Landing Continuum basically comes from breaking up a climb up into 7 separate pieces and each one of those being a possible landing as you hit the edge of an obstacle.  We only cover the top 3 here because they are the 2-foot, 1-foot, and assisted 1-foot landings.  The others we cover in our Climbing topic.  Which brings us to movement category number 2.

CLIMBING
Climbing rocks at Palisades State Park in South Dakota

Since Parkour is supposed to get you from point A to point B, eventually you’ll probably need to go up, and that means climbing.  Our beginner climbing skill set is designed to explain how to get from the ground to the top of any wall or obstacle.  

We start with the basic wall run, running straight toward a wall and kicking it to get as high as possible (eventually the goal being to grab the top of the wall, but we go over that a bit later), which leads into a bit of a tangent of the tic-tac.  A tic-tac in Parkour is any time you kick off an obstacle to change your direction.  Since the wall run is changing your forward running momentum into upward momentum, it’s technically a tic-tac.  Usually we mean diagonal running movement when talking about tic-tacs though, so we cover a simple one step diagonal tic-tac as a bit of a tangent from the wall run during our climbing classes.

Next up is the Cat Grab, one of the most iconic Parkour movements, as well as a basic introduction to the Cat Back.  Then comes the fun part.  With our goal of getting up on top of a wall or box, if you’re in your cat grab position that means you need to pull yourself up through a Climb Up.  Now, basically no one is strong enough to do this when they first start training Parkour, so we use this opportunity to cover some exercise science and talk about how to get stronger and more explosive using basic exercises of pull ups, push ups,
and dips.

Finally we finish the climbing concepts with a Top Out, which is getting from a support position up to standing on top.  We have 4 levels of Top Out, but at first we only cover the first couple.  Level 1 is getting up by any means necessary including using elbows, knees, etc.  We don’t actually allow people to climb like this at FoFa, so we immediately cover the level 2 top out – putting your foot on the outside of your hands and finishing the climb.  After this you should have all the tools to fully climb up a box, so it’s time to put it all together and climb some boxes!  At first just getting up a 5 or 6 foot tall box is great, but eventually the goal is to fully and properly climb something that is double your own height.  This will take a lot of training though.
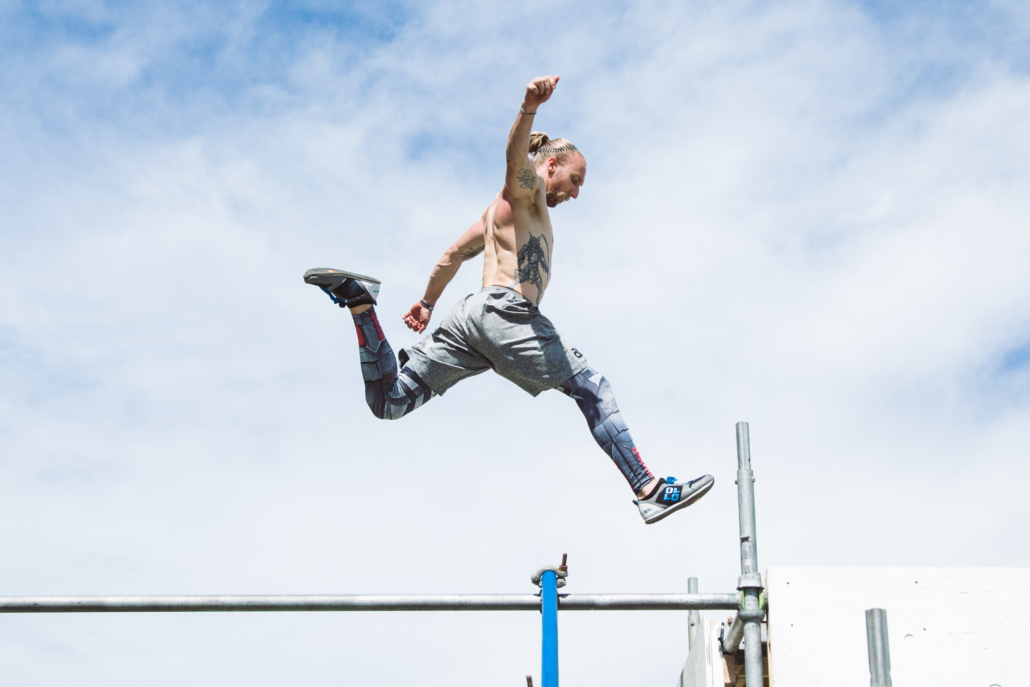
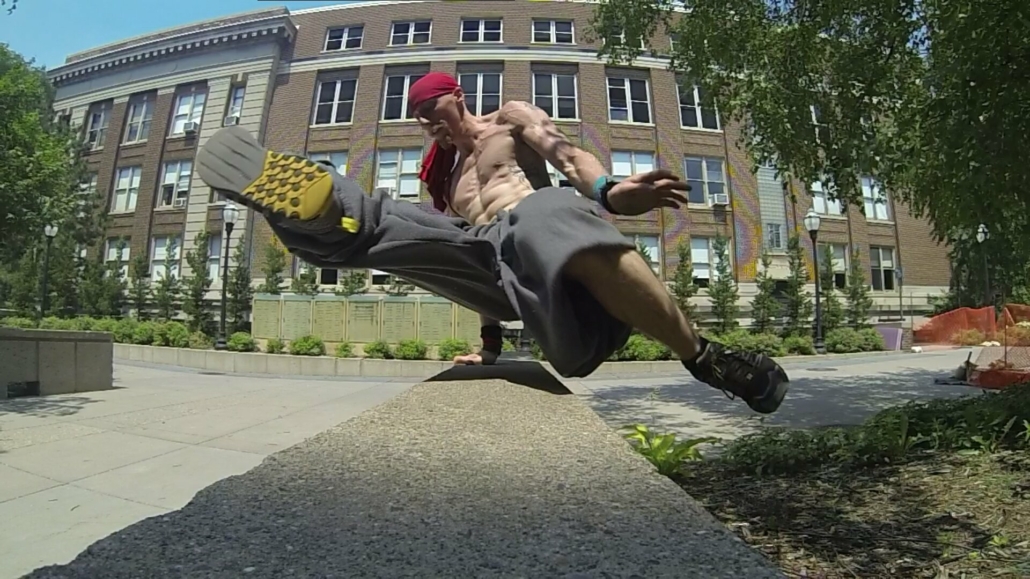
VAULTING

When most people think of Parkour, they immediately think of vaults so there’s no way we could have the best Parkour classes in the Twin Cities without teaching them.  Some of the most recognizable motions in all of Parkour are vaults.  A vault is getting over an obstacle with the assistance of your hands.  You can use more than just your hands (feet, butt, etc.), but you have to use your hands or it becomes a hurdle or stride.  There are billions of different vaults in the world of Parkour, but we consider just 5 of them to be the “basic” vaults.  And we don’t even teach all of them in our beginner program.  

We start with the Step Vault and Lazy Vault.  These are the simplest to learn and can be used to teach a bunch of different movement concepts like hand and foot placements, different take-off ideas, directions of motion, and even proprioception.  We teach 2 different variations of the Reverse Vault, with first sitting on the obstacle to get used to the rotation, and also a two handed variation that comes from the turn vault.  Finally, the other basic vault we cover is the Kong, but in our beginner classes we only do a Kong up on an obstacle.  We save the full Kong vault for our intermediate classes.

Beyond what we consider the basic vaults, we do cover some variations in our beginner classes as well.  The speed vault and thief vault are introduced as variations of the step and lazy vaults.  The turn vault is taught at ground level with the expectation shown that eventually it is meant to be done at height.  And finally we go over the Step Down to show that vaults can be used to descend down off an obstacle as well as go over them.  Sometimes we even combine the Kong Up and Step Down into the first double vault to use when going over wider obstacles.

ROLLING
Chad with that vault to roll from the other side.

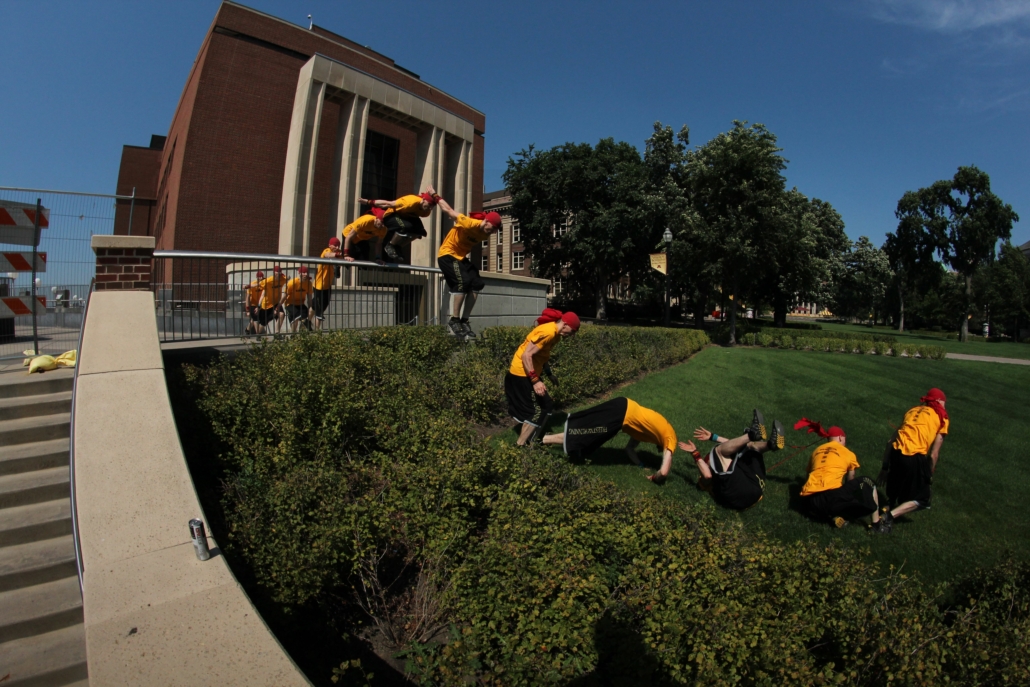
The shoulder roll is by far the most complicated movement in all of Parkour.  It’s extremely difficult to learn properly and will likely take years of practice to perfect.  You may have noticed that rolling was missing in our landing curriculum, and that’s because it’s so important that it gets a day completely to itself.  

We start with learning the absolute basics of how to do a shoulder roll.  There are a few different progression paths to get there, but for the most part we cover avoiding your head, pushing really hard with your hands, and keeping your feet symmetrically together.  We also go over the fact that the roll isn’t meant to absorb impact, but instead it transfers your downward force into forward force going through a rotation.  We emphasize getting length in your rolls and controlling the direction of the energy going into the roll.  The shoulder roll is also one of the most difficult movements to teach because everyone will roll slightly differently based on their body.  

After getting the basic roll down on a soft surface, we take all of our beginners to concrete to do at least one roll.  This is to teach them the anatomy of where exactly to roll and avoid all the boney bits in your shoulder, back, and hip.  Also this is to get them into practicing on hard ground.  It’s impossible to learn a perfect roll on a soft surface.

After that we work on adding a little height to our shoulder rolls.  We do small jumps off a three foot tall box as well as hanging in a gargoyle position on a seven foot tall box and dropping into the roll.  It’s extremely important to keep beginners low on these as most people don’t really understand the exponential impact of gravity and they have seen videos of high level athletes doing huge jumps to roll.  Many beginners will overestimate their abilities when they first start rolling.

Finally in our rolling classes we go over the backward shoulder roll.  This is introduced as a way to save yourself if you’re falling backward.  As we use this primarily as a falling technique, the most important part of the technique is not hitting your head on the ground.  No matter how crap the rest of the roll looks, as long as you don’t hit your head you’re good!

FLOW
Flowing on a short wall at the University of Minnesota

It’s extremely difficult to define “flow”.  We know it’s extremely important in everything that we do, but can you put into words exactly what it is?  We define flow very loosely with two basic concepts: continuous momentum and minimal steps.  I’ll probably write an entire other blog on that, so for now let’s focus on the actual movements we teach in the beginner flow class.  

We start with a new concept of reverse vaults.  Every vault can be turned into a reverse version of that vault just by kicking backward instead of forward.  We take the step vault and learn the reverse step vault and the lazy vault turns into a reverse lazy vault.  We also combine the reverse variations with their regular vaults to make the step and lazy dances.

Then we move into some over/under movements with a lazy over to step under on a bar or a beam.  The idea here is to be able to not only transition horizontally in your movement, but also up and down.  We also teach the step vault to 360 under.  These can be done with other vaults as well and students are often encouraged to make up their own combinations like these to start teaching some creativity.

Finally we teach a few random movements that would be used in freerunning style flow lines but not really in purist Parkour lines.  We teach the turn up, coffee grinder, leg cut, and sit turn.  After students have a grasp of these we play games of add-on to work on flowing different combinations together.

TUMBLING
You can’t teach the best Parkour classes in the Twin Cities without handstands!

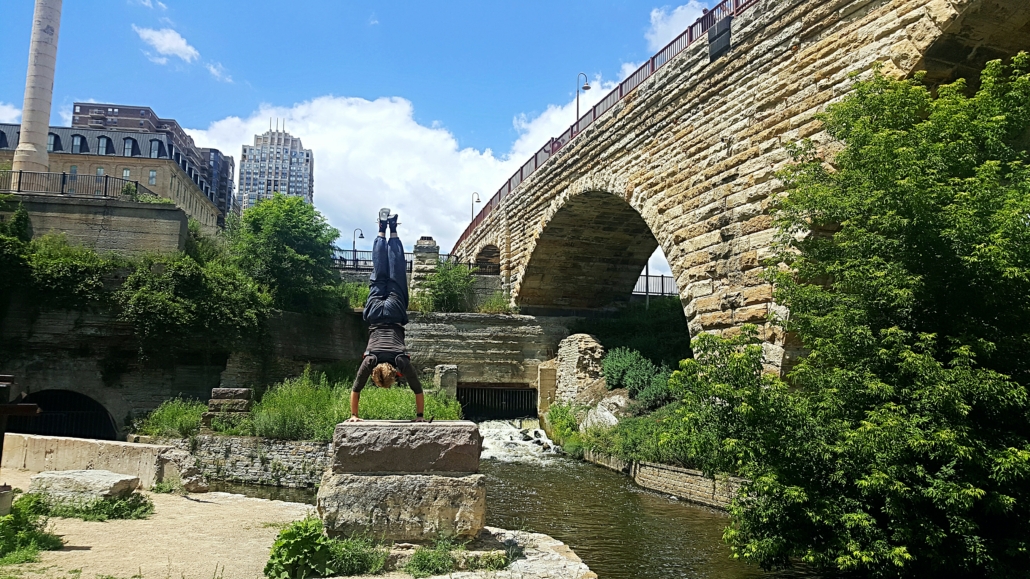
If you’re going to teach the best Parkour classes in the Twin Cities, at some point you’ll have to teach some flips, so that brings us to tumbling.  Tumbling tends to be a very polarizing subject.  It is either terrifying or extremely exciting depending on how comfortable a student is with going upside down. 

Our beginner tumbling program starts by teaching the absolute basic straight, hollow, arch, tuck, straddle, and pike shapes.  We go over exactly what these should look like and what they are used for. 

The rest of the class is based on the three most simple acrobatic movements: the handstand, cartwheel, and rolls.  For the handstands we start with basic rock ups in various shapes and some wall work. 

Many new students can already do cartwheels and rolls, but we have 100% beginner progressions to get into these movements. Cartwheels are pretty simple and we really try to enforce proper hand positioning and directions of entry and exit.  Rolling gets a little more in depth with forward rolls turning into dive rolls and sometimes even throwing front flips to the back on our big squishy pads!

Finally we get into a bit of bridge work on the wall and with some twisting. These concepts will turn into tricking movements like the gumbi and raiz… eventually.

BARS
Scaffolding is great for Parkour bar training!

Bar stuff is almost always the most foreign of movement to new students. In the real world railings are something to avoid. Ex-gymnasts are pretty much the only people who have played on bars anywhere other than a tiny bit on the playground as a child.

We start off with some simple underbars.  We talk about the regular underbar, bazooka underbar, 360 underbar, and step through underbar. All of these have different purposes, so it’s good to have a variety of these depending on the situation. 

After that everyone should be pretty use to how the bars feel and how well they can hold themselves, so it’s time to get swinging. Focusing on safety, we make sure everyone has a good re-grip and is releasing in the back of their swing so they can see the ground as they land.  Then we immediately go to releasing in the front and teach the lache to precision technique.  We don’t expect anyone to perfect this, it’s really just an introduction.

We also teach what we call a “Russian Pull Through” which is often students first time going upside down and backward with a backflip motion, so it tends to be a favorite. 

Finally (usually once students’ hands are hurting) we have a few moves we work on from a support position in the bar.  Sitting on a bar and tipping over backward to a knee hang, a forward roll over the bar, and a simple cast. Combining all of these skills into our curriculum has helped us create the best Parkour classes in the Twin Cities area.

WALL TRICKS
Chad flipping off a wall

Our wall tricks class is actually only half a class at the beginner level (there’s not a lot of stuff that beginners are ready for on a wall).  So we also do half the class on twisting techniques, which don’t really fit into the other classes.

We start with twisting little 90 degree jumps and 180 jumps.  We let any student who thinks they can go for 360, 540, or farther…but they will fall down eventually so we’re sure to take it slow.  Then we take these twisting concepts and add them to precision jumps, wall runs, and cat grabs.  With each technique focusing on controlling the twist rather than just throwing yourself around as fast as possible.

Then getting into actual wall tricks, we go over the basics of the wall spin and SUHPWG.  We use the side of a tipped over trapezoid to teach these at an angle and then slowly raise the angle up during their training until eventually they can be done on a completely flat wall (not in the beginner class though).  We also start teaching wall flip timers and usually spend a good deal of time on the wall flip technique as it’s something that is extremely popular and many people want to learn it.

And that’s our beginner curriculum in a nutshell.  As I mentioned at the beginning of this, we teach based on technique mostly instead of other styles of Parkour coaching that can be based more on conditioning or creativity and individual problem solving.  I believe that without a good base of simple Parkour techniques, it’s kind of pointless to try to get students to be creative and figure it out themselves, and conditioning should be used to supplement the technique training rather than the other way around.  

If you’re interested in joining the best Parkour classes in the Twin Cities, be sure to check out Fight or Flight Academy!  Keep training and as always…Remember Rule #8, DON’T DIE!

-Chad Zwadlo

P.S. – Want to try all of these skills, in our space, for free, with a coach’s help? Visit our First Timers page and book a free private lesson!

20 Basic Vaults for Parkour & Freerunning

This post is primarily about static flow using a single, short, thin obstacle to vault.  Very much less so about parkour style overcoming an obstacle and continuing motion.

Teaching for over 10 years at my Parkour gym in Minneapolis has lead me really analyze how we teach vaulting in our Parkour classes.  I have been working on a theory/concept of vault flow for parkour and freerunning (think stuff like this video here).  What I’ve been trying to do is systematically break down the vaulting technique of parkour and freerunning into it’s simplest form so I could exhaustively practice every possible way to overcome a typical vault style obstacle.  These ideas have been constantly evolving throughout the years to include more things or become easier to understand.

Speed Vault

To do a speed vault; you will first jump off of your left leg, put your left hand on the obstacle as you clear it, and land on your left leg to step out.  You could also do the same vault using your right leg to jump off, your right hand on the obstacle, and land on your right leg.  (This is also called a “Safety Vault” or “Step Vault” if you use your leg to help you over.)  These would both be considered speed vaults, but are very different in a movement sense and you should definitely practice both of them.

Chad demonstrates speed vault parkour gym minneapolis


Lazy Vault

To do a lazy vault; you will first jump off with your right leg, put your left hand on the obstacle as you clear it, and land on your left leg.  You can also do this on the other side by jumping off with your left leg, putting your right hand on the obstacle, and landing and your right leg.  Again, these are different movements and should both be practiced.  Now, if we compare the Speed Vault and the Lazy Vault we can see the only difference is the leg that you first jump off of.  Other than that, the vaults are identical from an analytical standpoint.

Chad demonstrates lazy vault parkour gym minneapolis

These are the first four vaults in our system and you can start to see why there are some of these differences.  The vaults themselves are very similar, however their uses are very different because of the way your body is positioned.  Because of the way the take-off works, a speed vault tends to work best if you are coming straight at your obstacle, and running straight away from the obstacle. Alternatively, a lazy vault tends to work best if you are coming at your obstacle from an angle, and running away at a similar angle.

Chad demonstrates speed vault parkour gym minneapolis
Chad demonstrates lazy vault parkour gym minneapolis


Thief Vault

Alright, so we’ve talked about the differences of your jumping leg and the differences of the hand you place on the obstacle.  Now it’s time to talk about the landing leg.  We’ll start by taking a speed vault, but landing on the other leg.  We call this a Thief Vault.  To do a thief vault; first start by jumping off of your left leg, putting your left hand on the obstacle and landing on your right leg.  Once again you can switch to the other side by jumping off of your right leg, putting your right hand on the obstacle and landing on your left leg.  To go back to talking about the vaulting angles again, the thief vault will tend to come into the vault at an angle, and run out straight so it makes a 90 degree turn.

Chad demonstrates thief vault parkour gym minneapolis


Lazy Turn Vault

Finally, we can start with the lazy vault and land on the opposite leg — a Lazy Turn Vault.  To do a lazy turn vault;  you will start by jumping off of your left leg, putting your right hand on the obstacle, and landing on your left leg.  Also on the other side by jumping off of you right leg, putting your left hand on the obstacle, and landing on your right leg.  So far we have not found any practical purpose for this vault in a parkour sense.  However, we think it’s one of those things that since you can do it, you may as well practice it just in case that purpose is found eventually.  There are some uses for this vault in more of a freerunning sense, though.

Chad demonstrates lazy turn vault parkour gym minneapolis


Reverse Variations

We are now up to 8 different vaults in the system, and we’re going to add a new concept that doubles that number. All of these vaults so far start by kicking a leg forward in front of you and over the obstacle.  You can also do all of these vaults by kicking that leg backwards behind you and over the obstacle.  We call these the “reverse” variations.

Reverse Speed (or reverse safety)

Chad demonstrates reverse speed vault parkour gym minneapolis
Chad demonstrates reverse vault parkour gym minneapolis

Reverse Lazy

Chad demonstrates reverse lazy vault parkour gym minneapolis
 

Reverse Thief (many of us simply call this the “Reverse Vault”)

Chad demonstrates reverse thief vault parkour gym minneapolis
Chad demonstrates reverse vault parkour gym minneapolis

Reverse Lazy Turn (this one looks and feels almost identical to the speed vault.  There ends up being a little overlap when we break it down this way)

Chad demonstrates reverse lazy turn vault parkour gym minneapolis
Chad demonstrates reverse lazy vault parkour gym minneapolis


Dash Vault

That brings us up to 16 vaults in the system.  So far these seem to be the only ways you can get over a basic obstacle using only one hand (going into the vault).  All other vaults seem to be a variation of these with added twists, flips, turns, feet done together, or anything like that.  However there still is a bit missing.  If you come straight at the obstacle, kicking your feet straight out in front of you, and put both hands down on the obstacle…you have the Dash Vault.  You can do a dash vault by jumping off your left or right leg, and they feel distinctly different.  But no matter how you land it seems to feel pretty much the same, so I only consider the left jump dash and right jump dash to be different.

Chad demonstrates dash vault parkour gym minneapolis


Kong Vault

And finally, if you do the reverse variation of the dash vault by kicking your leg backwards as you approach the obstacle, this is called the Kong Vault.  Again, there is a distinct difference between a left and right leg jump at the beginning, but it doesn’t really seem to make much of a difference which leg you land on.  So once again I would consider these two separate vaults.

Chad demonstrates kong vault parkour gym minneapolis


And those are the 20 basic vaults for Parkour and Freerunning.  These vaults can all be added to with any sort of extra movements and done in many different situations to make them seem different, but deep down they all seem to come from one of these base vaults.  Play with this system yourself and maybe you’ll find a way to build on it and add more to it.  Or, just play with the originals and come up with new ways of doing all of them!  Also check out my Parkour classes in Minneapolis to learn all of this stuff directly from me!

Martial Arts vs. Parkour

Parkour is often considered a discipline and compared to martial arts in it’s training.  With over 25 years of experience training both disciplines and spending the last 15 years focused on creating the most fun workout in the Twin Cities at my Parkour gym in Edina, I have my own personal thoughts on this…and I figured I’d share 🙂

MY BACKGROUND IN MARTIAL ARTS

As a young kid, I tried a bunch of traditional American sports.  I was in a softball league, I was on a basketball team, I did wrestling for like a week, I went to about four track practices, and I was even on a bowling league.  None of this really clicked with me because I was always a really sickly asthmatic kid with no apparent natural athletic ability and I didn’t enjoy any of it (except bowling because I could just mess around with my friends).  When I was 14, one of my friends invited me to join him in his karate class.  The instructor saw the potential in me and I absolutely loved it.  Not long after that I was spending every day after school for 3-4 hours training at the karate studio.  Things came quickly and I progressed through the ranks pretty fast.  I got my black belt in 2002 and my second degree black belt in 2004.  I kept training after that, but a lot more on my own and never progressed any farther in the belt ranks for personal reasons.

The style I trained in is called simply American Freestyle Karate.  Our Master Instructor had black belts in something like 8 different styles of martial arts including a 6th degree black in Okinawan Karate and a 4th degree black belt in Judo.  He took everything that he knew, and taught us the stuff he liked and he found worked the best.  This included Tae Kwon Do style kicks, Karate blocks and self defenses, Western Boxing punching, Judo takedowns, Jiu Jitsu and Aikido joint locks, and Kali weapons training.  In addition to the required weaponry (Filipino Escrima Stick), I also trained in traditional Japanese sword training and non traditional bo-staff.

I started teaching my first karate students when I was 17, and started teaching my own classes once I got my black belt.  I taught karate pretty much non-stop either with private students or full on classes until just last year.  I’ve now officially retired from martial arts teaching.  I still train sporadically, but really not very consistently or intensely.

MY BACKGROUND IN PARKOUR

It’s hard to pinpoint the exact time that I started training parkour.  In my karate training I did a lot of what we called “Extreme” stuff back in my day (they call it “tricking” now).  Many of these movements are used in freerunning now so maybe that counts.  My first back flip was done when I was 15 in my front yard.  I just decided that I could do it, so I did.  Around 2002, I started watching videos on the internet (the early days of the internet, before Youtube).  When I was watching some of the big teams back then like Team Ryoko from Toronto and Saltomortalez from Prague, they started doing crazy outdoor tricking stuff…so I started doing that too.

My first “parkour” video would have been Russian Climbing by Oleg Vorslav.  This was before Youtube existed and I’m not really sure when or where I first saw it.  But I immediately decided that this is what I needed to do with the rest of my life.  I was training for quite a while before I even realized there were other people in the US that were doing the same thing that I was.  My first big jam was in Madison (not sure what year that was) with Mark Toorock, Travis Graves, Levi Meeuwenburg, and bunch of other awesome people.

Now, years later, I own a parkour gym in Minneapolis and previous member of a major international parkour team.  I love my life!

HISTORY OF MARTIAL ARTS 

Bruce Lee always loved a fun workout in Edina

I’m not going to write a novel about the history of all martial arts here.  If you really want to learn all about that, you can go look it all up for yourselves.  I really only want to point out one key moment in martial arts history.  And that is the contributions of Bruce Lee.  Most of us really look up to Bruce Lee for the extremely inspirational life he lead and the great things he did for martial arts in general.  However, I like to remind people that at the time he was doing all those “great things,” most of the martial arts masters of the time really didn’t like it.  Martial arts at the time were very traditional and there was a very “correct” way to do things.  People did not mix styles or make up their own ways of fighting.  Bruce Lee changed all that by going against tradition and creating his own path.

HISTORY OF PARKOUR

David Belle working on the most fun workout

Again, I’m not going to write a novel here.  Feel free to look everything up yourself.  What I do want to mention has to do with what I’ve noticed as a parallel to the history of martial arts.  Many of the original practitioners of parkour have often brought up the fact that they highly look up to Bruce Lee and what he did.  But for some reason those same people and the ones that follow them closely, insist that we must follow the traditional ways of parkour and we should not be allowed to train in our own ways.  I’ve always thought this was an interesting contradiction…but probably for another blog entirely.

MY TRAINING IN MARTIAL ARTS

Training in any martial art is based in hard work and discipline.  Long hours of practicing techniques over and over until you completely master them and can perform them without thinking or hesitating.  Then, after many techniques have been mastered, you are supposed to forget the techniques themselves and react to situations instantly with no thought or hesitation.  Often practitioners also will supplement their training with rigorous conditioning.  Both body weight conditioning and weight training are often used.

When I was training martial arts, I took a fondness to the high flying, spinning, flipping kicks and tricks.  My thoughts were always that if I could teach my body to do those sort of things, I would have an even easier time with the basic techniques.  Also my basics needed to be absolutely perfect to be able to perform those techniques in the first place.  It was well known that none of those things would ever be useful in a real world self defense situation, but I was pretty sure I would never be in a situation like that.  And the only times I ever have been in a situation like that, those basics I trained so hard worked very well.

MY TRAINING IN PARKOUR

Training in parkour is based in hard work and discipline.  Long hours of practicing techniques over and over until you completely master them and can perform them without thinking or hesitating.  Then, after many techniques have been mastered, you are supposed to forget the techniques themselves and react to situations instantly with no thought or hesitation.  Often practitioners also will supplement their training with rigorous conditioning.  Both body weight conditioning and weight training are often used.

While I’ve been training parkour, I’ve taken a fondness to the high flying, spinning, flipping tricks.  My thoughts were always that if I could teach my body to do those sort of things, I would have an even easier time with the basic techniques.  Also my basics needed to be absolutely perfect to be able to perform those techniques in the first place.  It was well known that none of those things would ever be useful in a real world situation, but I was pretty sure I would never be in a situation like that.  And the only times I ever have been in a situation like that, those basics I trained so hard worked very well.

Hmmmmmm…sounds a bit familiar doesn’t it?

PHILOSOPHIES OF MARTIAL ARTS VS. PARKOUR

knowledge for the most useful and fun workout in Edina

I believe this is where the big differences are.  While there are some similarities in the philosophies, I want to focus on one very big difference.  While you are training martial arts, you are very thoroughly instructed that you are never actually supposed to use the things you are learning.  Even in a situation where you could use them, you are supposed to be the better person and just walk away.  And if you ever want to know if what you are learning actually works, it’s not like you can just walk up to a random person ad “test out” your martial arts on them.  At least…not legally.

Parkour, on the other hand, teaches us to use what we are learning whenever and wherever possible.  We are taught that at any and every circumstance we should be testing out our limits against every obstacle we can find.  We are supposed to let parkour become so much of us, that there are no more set paths in the world and to see opportunity of movement everywhere we look.  In a situation where we really do need to get somewhere or get away from something, we are absolutely supposed to use what we have learned, and if you want to know if your training works…just run!  You’ll know quick if you are training properly if you just try to run as fast as you can across any set terrain.

THE COMPARISON

This is the reason that I have found parkour to be a superior discipline to martial arts.  Although it requires the same dedication, hard work, and training; if we find ourselves in a real world situation where we can use it, we are encouraged to rather than forbidden to.


And I try to take all this into account when teaching my Parkour classes to help give people not only the most useful training I possibly can, but also the most fun workout possible!